

이 페이지는 아직 번역되지 않았습니다. 영어 버전
Naxxramas
Naxxramas is a level 60 raid in World of Warcraft: Forever, with 15 bosses. Not announced for Forever: Blizzard's raid overview of 20 October names three raids for Forever: Barrow Deeps, Hyjal Summit and Onyxia's Lair. This one is in the game files, but Blizzard hasn't said if or when it comes.
Raid. Levels 60–60 (Forever client: group finder). 40 players (Forever client).
Map
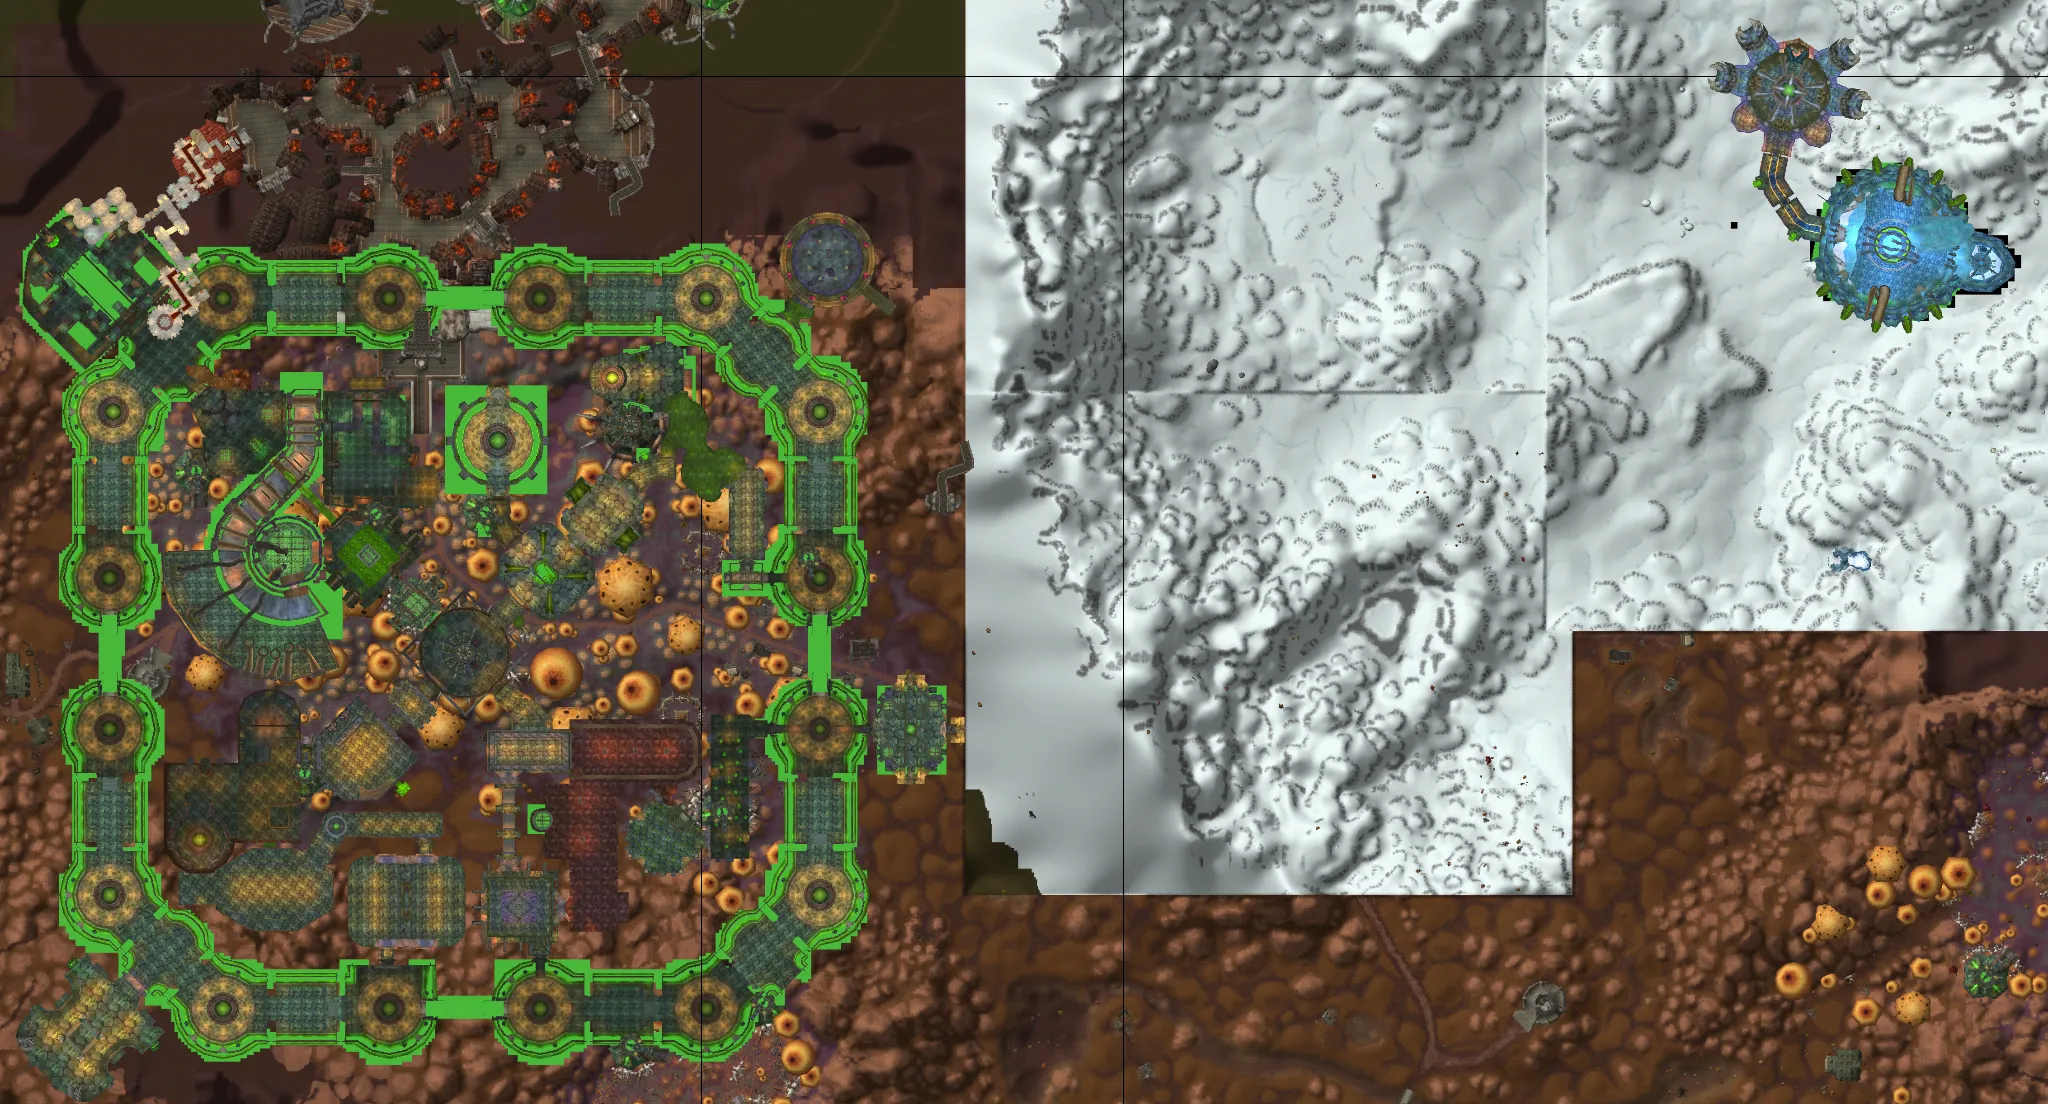
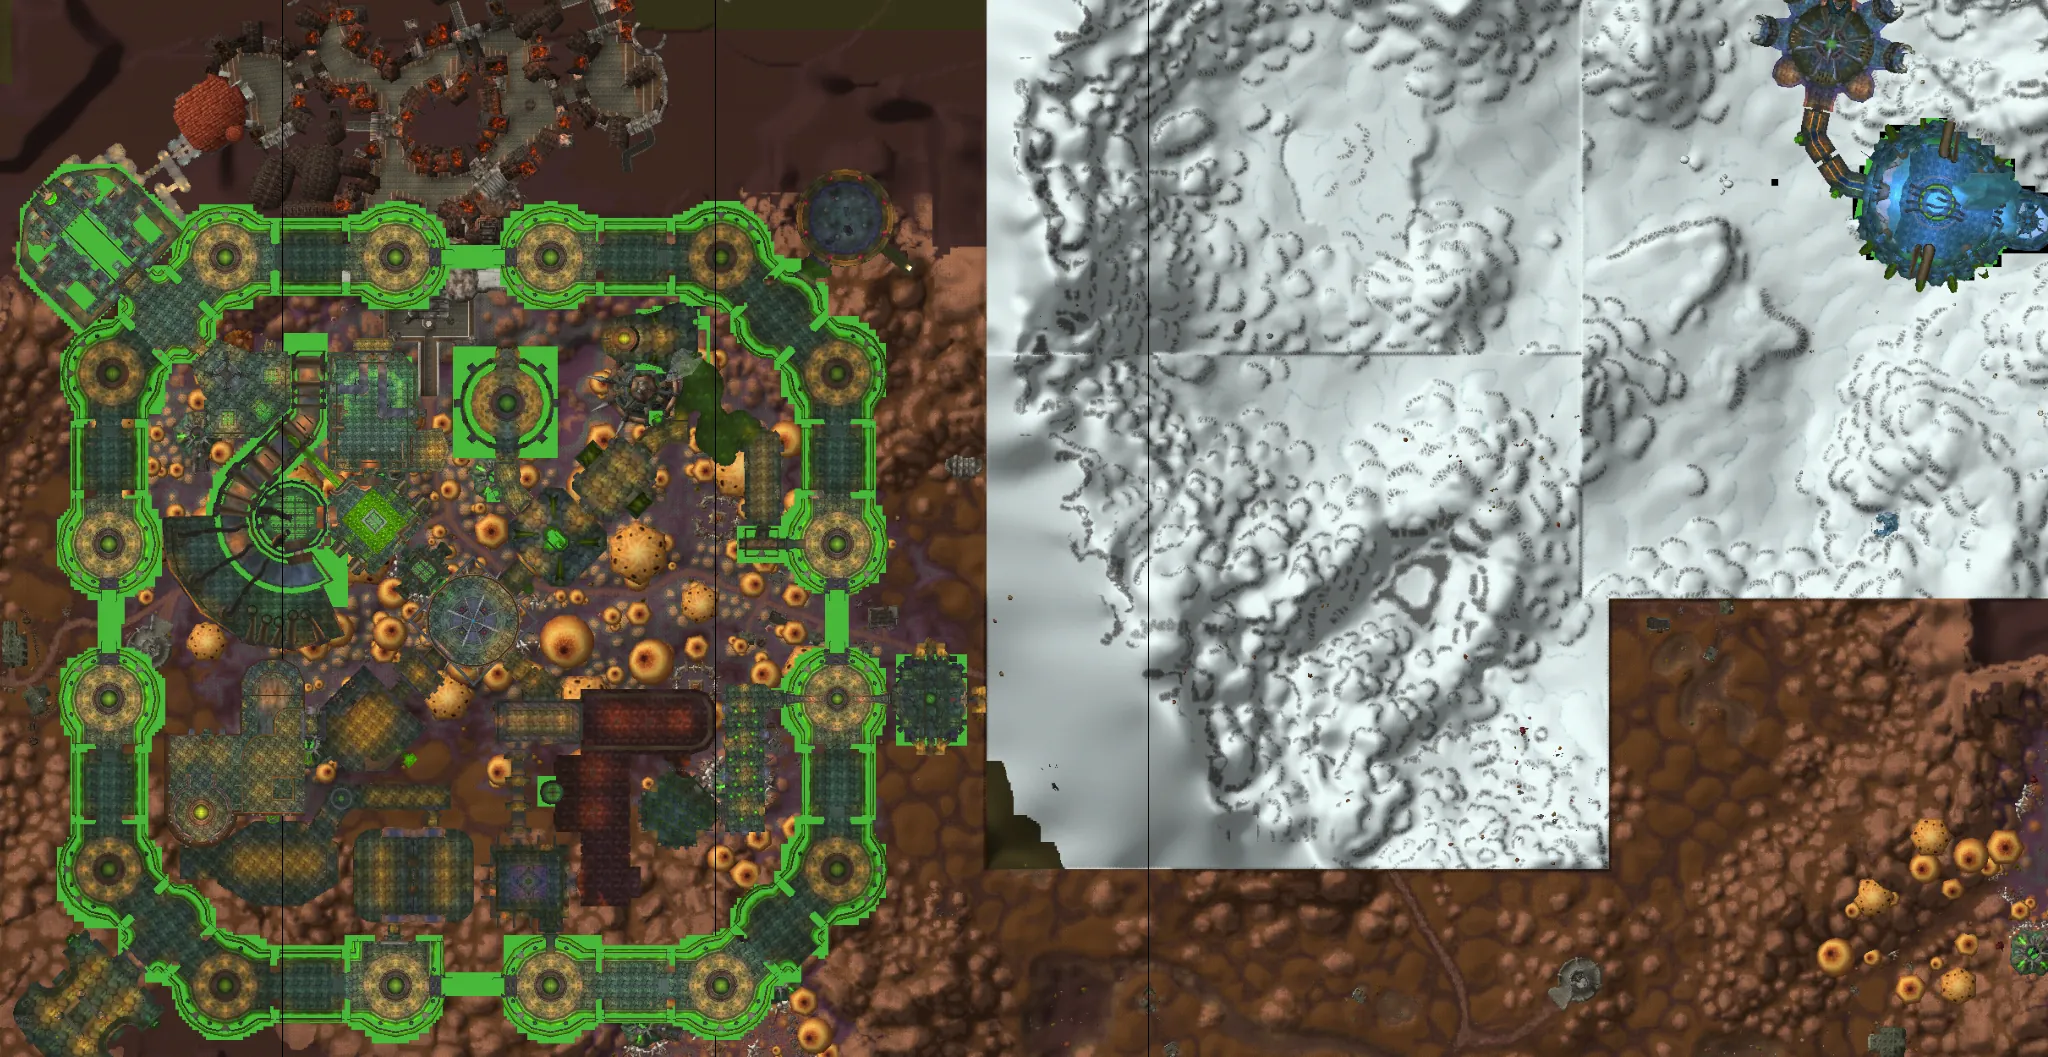
A map of Naxxramas with 2 floors (Part 1: Anub'Rekhan, Grand Widow Faerlina ..., Part 2: Grobbulus, Thaddius), stitched from the Forever client's own minimap art (Forever client), with the bosses numbered in the order the client gives (their spots are Classic spawn data until players confirm them in Forever).
The map shows 449 packs of 811 mobs and 52 patrol paths, 67 of the packs marked high danger, with what each pack holds, what to watch for and suggested marks (Classic data from CMaNGOS: Forever may have moved them).
Worth it for: Ring of the Dreadnaught (Dreadnaught's Battlegear set); Bonescythe Ring (Bonescythe Armor set); Ring of Faith (Vestments of Faith set).
How to run it
How Classic's Naxxramas plays. Blizzard's raid overview of 20 October doesn't name this raid for Forever, so there is no date and no word on changes: this guide follows Classic until players' logs show otherwise.
Fifteen bosses in the floating necropolis, in four wings and a final chamber, cleared by 40 level 60 players. The fights are mostly about positioning and discipline: kill orders, tank swaps, moving at the right moment and healing rotas. Sapphiron needs frost resistance and Kel'Thuzad ends the raid.
Before you go
- Level: Level 60 in well-geared raid sets. Naxxramas is the hardest raid in Classic.
- Group: 40 players: usually 5 or more tanks, about 10 healers and the rest damage dealers.
- Getting in: In Classic you need Honored with the Argent Dawn to take the attunement quest, The Dread Citadel - Naxxramas, from Archmage Angela Dosantos at Light's Hope Chapel; it costs less gold at Revered and nothing at Exalted. Whether Forever uses the same steps hasn't been said.
- Resistance: Frost resistance for Sapphiron. Shadow resistance is useful on several fights. Gear for nature and shadow resistance is worth carrying.
- Bring: Frost Protection Potions for Sapphiron and Kel'Thuzad; Flasks or elixirs and food for the boss nights; Free Action Potions and Greater Protection Potions as needed for trash
- Who you need: Four or five tanks: some fights need three or more tanks at once; Priests for mind control on Razuvious; Hunters with Tranquilizing Shot for Gluth; A healing rota written down before Loatheb
- Also: Wings can be done in any order: most raids start with the Arachnid Quarter, then the Plague, Military and Construct Quarters, and finish with Sapphiron and Kel'Thuzad.
Trash
- Each wing's trash is dangerous in packs: pull one pack at a time and use crowd control.
- Several packs use poison and disease: bring cleansing and remove it from tanks first.
- Some packs fear, silence or stun: Fear Ward, Tremor Totems and Free Action Potions save wipes on the bigger pulls.
Bosses
15 bosses, in the client's order (Forever client).
1. Anub'Rekhan
A giant Nerubian with two Crypt Guards and a locust swarm. Tank the guards, kill the boss and run when the swarm starts.
- Tank Anub'Rekhan and both Crypt Guards apart.
- Kill the Crypt Guards or ignore them and burn the boss.
- When he casts Locust Swarm, the raid moves away and keeps moving: don't stand in the swarm.
- Kill any scarabs left by dead guards quickly.
Tank
- Hold both Summon Crypt Guard Crypt Guards away from the raid.
- The main tank keeps Anub'Rekhan away from the others.
Healers
- Stay at range and keep moving through the swarm.
- Anub'Rekhan's Aura hurts everyone near him: watch for it.
Damage dealers
- Kill or crowd-control the Crypt Guards.
- Don't stand in the swarm.
What wipes groups
- Standing still in the locust swarm.
- Crypt Guards left loose.
Abilities
- Anub'Rekhan's Aura (Classic data)
- Summon Crypt Guard (Classic data)
- Double Attack (Classic data): Gives the caster ? extra attacks.
- Despawn Crypt Guards (Classic data)
- Locust Swarm (Classic data)
Tank tips (Classic data)
- Pick up 2 Crypt Guard that join when the fight starts.
Damage tips (Classic data)
- 2 Crypt Guard join when the fight starts: kill or crowd-control them.
Loot
- Splinter of Atiesh (Classic data, 30%)
- Desecrated Bracers (Classic data, 33%)
- Desecrated Wristguards (Classic data, 33%)
- Desecrated Bindings (Classic data, 33%)
- Touch of Frost (Classic data, 20%)
- Band of Unanswered Prayers (Classic data, 20%)
2. Grand Widow Faerlina
Faerlina and her followers. Her enrage only stops when one of her worshippers is killed, so the raid keeps a few alive.
- Tank Faerlina and the Followers apart.
- When she enrages (Enrage), kill a worshipper at once: that calms her.
- Use crowd control on the Worshippers so they are not all dead at once.
- Move out of rain-of-fire patches.
Tank
- Hold the Naxxramas Followers and Worshippers apart from the raid.
- Expect a heavy hit while she is enraged.
Healers
- Heal the tank through Enrage: it more than doubles her damage.
- Keep the Follower tanks alive.
Damage dealers
- Don't kill every Worshipper: you need them for her enrage.
- Kill the Followers first, then burn Faerlina.
What wipes groups
- Enrage up with no Worshipper to kill.
- Standing in fire on the floor.
Abilities
- Enrage (Classic data): Increases the caster's attack speed by 75% and the Physical damage it deals by 150 for 30 min.
Tank tips (Classic data)
- Pick up 4 Naxxramas Worshipper that join when the fight starts.
- Pick up 2 Naxxramas Follower that join when the fight starts.
Damage tips (Classic data)
- 4 Naxxramas Worshipper join when the fight starts: kill or crowd-control them.
- 2 Naxxramas Follower join when the fight starts: kill or crowd-control them.
Loot
- Splinter of Atiesh (Classic data, 30%)
- Desecrated Bracers (Classic data, 33%)
- Desecrated Wristguards (Classic data, 33%)
- Desecrated Bindings (Classic data, 33%)
- Icebane Pauldrons (Classic data, 20%)
- Polar Shoulder Pads (Classic data, 20%)
- Malice Stone Pendant (Classic data, 20%)
3. Maexxna
A huge spider that wraps players in webs, sprays the raid and poisons the tank. Free webbed players quickly and keep the tank healed.
- Tank Maexxna in the middle with the raid around her.
- Kill the webs holding webbed players so healers can heal them.
- When she sprays webs, everyone is stunned for a short time: heal up straight after.
- At low health she frenzies: burn her down.
Tank
- Her poison cuts the healing you receive: use poison cleansing and keep tank healers ready.
- Keep a cooldown ready for the low-health frenzy.
Healers
- Heal webbed players while the raid kills their web.
- Use poison cleansing on the tank.
Damage dealers
- Kill the webs at once and return to Maexxna.
- Burn her down at low health.
What wipes groups
- Webbed healers staying stuck.
- Poison left on the tank.
Abilities
- Double Attack (Classic data): Gives the caster ? extra attacks.
Loot
- Splinter of Atiesh (Classic data, 30%)
- Desecrated Gauntlets (Classic data, 56%)
- Desecrated Handguards (Classic data, 56%)
- Desecrated Gloves (Classic data, 56%)
- Pendant of Forgotten Names (Classic data, 20%)
- Kiss of the Spider (Classic data, 20%)
4. Noth the Plaguebringer
Noth teleports away from the room at set times and sends skeletons. While he is away, kill them. When he returns, he curses the raid and blinks around.
- Tank Noth in the middle of the room with the raid close.
- When he teleports (Teleport), kill the skeletons that arrive (Summon Skeletons) and come back when he returns (Teleport Return).
- Remove his curse from healers and tanks first.
- Repeat until he dies.
Tank
- Noth blinks (Blink) and drops threat: pick him up at once after each blink.
- Skeletons need their own tanks while he is away.
Healers
- Keep curses off healers and the main tank.
- Cripple slows and weakens whoever it hits.
Damage dealers
- Kill skeletons quickly in each balcony phase.
- Mages and druids: remove his curse.
What wipes groups
- Curse left on healers.
- Nobody picking him up after a blink.
Abilities
- Teleport (Classic data)
- Immune All (Classic data)
- Teleport Return (Classic data)
- Summon Skeletons (Classic data)
- Despawn Summons (Classic data)
- Summon Skeleton (Classic data)
- Summon Skeleton (Classic data)
- Cripple (Classic data): Increases the time between an enemy's attacks by 100% and its movement by 50%, in addition to reducing its Strength by 50%. Lasts 15 sec.
- Blink (Classic data): Teleports the caster 20 yd. forward unless something is in the way. Also frees the caster from any bonds.
- Blink (Classic data): Teleports the caster 20 yd. forward unless something is in the way. Also frees the caster from any bonds.
- Blink (Classic data): Teleports the caster 20 yd. forward unless something is in the way. Also frees the caster from any bonds.
- Blink (Classic data): Teleports the caster 20 yd. forward unless something is in the way. Also frees the caster from any bonds.
Loot
- Splinter of Atiesh (Classic data, 30%)
- Desecrated Waistguard (Classic data, 33%)
- Desecrated Girdle (Classic data, 33%)
- Desecrated Belt (Classic data, 33%)
- Totem of Flowing Water (Classic data, 14%)
- Libram of Light (Classic data, 14%)
- Hailstone Band (Classic data, 14%)
- Band of the Inevitable (Classic data, 14%)
5. Heigan the Unclean
A dance. The floor is split into zones, one safe at a time, while Heigan erupts the others. Learn the pattern and move on time.
- Tank Heigan on the platform steps; the rest of the raid stands in the safe zone.
- Move zone to zone as the eruptions come (Plague Wave Controller (Slow) and Plague Wave Controller (Fast)) and stay out of the active one.
- When he teleports (Teleport Self) up to his platform, run the faster dance and stay out of Plague Cloud.
- Return to the slow dance when he comes back.
Tank
- Keep Heigan in melee range of the steps.
- Move with the raid when a zone goes unsafe.
Healers
- Move with the raid: heal on the run.
- Plague Cloud damages everyone in it: stay out.
Damage dealers
- Move at the first sign of each wave.
- Stay out of Plague Cloud on the platform.
What wipes groups
- Dancing out of time.
- Standing in the wrong zone.
Abilities
- Plague Wave Controller (Slow) (Classic data)
- Plague Wave Controller (Fast) (Classic data)
- Teleport Self (Classic data)
- Plague Cloud (Classic data)
Loot
- Splinter of Atiesh (Classic data, 30%)
- Desecrated Waistguard (Classic data, 33%)
- Desecrated Girdle (Classic data, 33%)
- Desecrated Belt (Classic data, 33%)
- Icebane Helmet (Classic data, 20%)
- Icy Scale Coif (Classic data, 20%)
- Necklace of Necropsy (Classic data, 20%)
6. Loatheb
A damage race with a healing rota. His curses stop most healing, so healers heal in a planned order. Spores give a buff to whoever stands nearest.
- Tank Loatheb in the middle.
- Healers follow the rota written before the pull.
- Players on spore duty kill spores and take the buff.
- Burn him down fast: the fight is a damage race.
Tank
- Hold Loatheb and take heavy damage.
- Use your cooldowns on the rota.
Healers
- Follow the rota: who heals when and who is on tank duty.
- Don't heal out of turn.
Damage dealers
- Go all in on Loatheb.
- Spore players: be on time at your spot.
What wipes groups
- Healers breaking the rota.
- Nobody on spore duty.
Loot
- Splinter of Atiesh (Classic data, 30%)
- Desecrated Legplates (Classic data, 56%)
- Desecrated Legguards (Classic data, 56%)
- Desecrated Leggings (Classic data, 56%)
- Ring of Spiritual Fervor (Classic data, 20%)
- Band of Unnatural Forces (Classic data, 20%)
- Loatheb's Reflection (Classic data, 20%)
7. Instructor Razuvious
Razuvious is too strong to tank directly. Priests mind control his four Deathknight Understudies and use them to tank him, while he screams and burns mana.
- Priests mind control the Understudies at the pull.
- Understudies taunt Razuvious (Taunt) and hold him; they need to be kept alive.
- Healers and casters stay out of mana-burn range (Disrupting Shout).
- Kill the rest of the Understudies if control is lost.
Tank
- Mind-controlled Understudies take your place on the boss.
- If an Understudy dies, a mind controller takes the next one.
Healers
- Disrupting Shout burns a lot of mana: expect it every few seconds.
- Heal the Understudy on the boss.
Damage dealers
- Don't pull threat off the Understudy.
- Keep away from the boss's shout.
What wipes groups
- Losing every Understudy.
- Mana burned off the healers.
Abilities
- Taunt (Classic data): Taunts the target to attack you.
- Disrupting Shout (Classic data): Scream fiercely, burning 4050 to 4950 mana from enemies.
- Hopeless (Classic data)
Tank tips (Classic data)
- Pick up 4 Deathknight Understudy that join when the fight starts.
Damage tips (Classic data)
- 4 Deathknight Understudy join when the fight starts: kill or crowd-control them.
Loot
- Splinter of Atiesh (Classic data, 30%)
- Desecrated Sabatons (Classic data, 33%)
- Desecrated Boots (Classic data, 33%)
- Desecrated Sandals (Classic data, 33%)
- Idol of Longevity (Classic data, 17%)
- Signet of the Fallen Defender (Classic data, 17%)
8. Gothik the Harvester
The raid is split in two on either side of a wall. Waves of undead come at both halves while Gothik stays out of reach. When the wall opens, finish him.
- Split the raid in two before the pull: one half on each side.
- Kill each wave on your side: trainees (Summon Trainee), knights (Summon Knight) and mounted knights (Summon Mounted Knight).
- Gothik teleports between sides (Teleport Left, Teleport Right): the side he's on has to cope.
- When the gate opens, bring everyone together and kill him.
Tank
- Hold each wave as it arrives on your side.
- Pick up the knights first.
Healers
- Each half needs its own healers.
- Keep your side alive until the gate opens.
Damage dealers
- Kill the highest-priority adds on your side.
- Watch where Gothik teleports.
What wipes groups
- One half too weak.
- Adds surviving when the gate opens.
Abilities
- Immune All (Classic data)
- Teleport Left (Classic data)
- Reset Gothik Event (Classic data)
- To Anchor 1 (Classic data)
- To Anchor 1 (Classic data)
- To Anchor 1 (Classic data)
- Summon Trainee (Classic data)
- Summon Knight (Classic data)
- Summon Mounted Knight (Classic data)
- Teleport Right (Classic data)
Loot
- Splinter of Atiesh (Classic data, 30%)
- Desecrated Sabatons (Classic data, 33%)
- Desecrated Boots (Classic data, 33%)
- Desecrated Sandals (Classic data, 33%)
- Polar Helmet (Classic data, 20%)
- Sadist's Collar (Classic data, 20%)
- Glacial Headdress (Classic data, 20%)
9. The Four Horsemen
Four bosses in the corners of the room: Thane Korth'azz, Lady Blaumeux, Sir Zeliek and the Baron. Each has a mark that stacks on whoever is near, so tanks and raid groups rotate between corners. Kill order and rotation must be planned.
- Tank each horseman in his own corner.
- Rotate tanks and groups between corners to share the marks.
- Pick a kill order before the pull and stick to it.
- A dead horseman leaves a spirit (Summon Spirit of Zeliek, Summon Spirit of Blaumeux, Summon Spirit of Korth'azz and Summon Spirit of Mograine): move away from it.
Tank
- Swap on the mark stacks: don't get too high.
- Use Shield Wall for emergencies if you have a shield.
Healers
- Healers rotate with their corner groups.
- Heal tanks through the mark stacks.
Damage dealers
- Stay in your assigned corner.
- Don't stand near a horseman you're not fighting.
What wipes groups
- Mark stacks left too long.
- Nobody swapping corners on time.
Abilities
- Shield Wall (Classic data): Reduces the Physical and magical damage taken by the caster by 75% for 20 sec.
- Summon Spirit of Korth'azz (Classic data)
- Summon Spirit of Blaumeux (Classic data)
- Summon Spirit of Mograine (Classic data)
- Summon Spirit of Zeliek (Classic data)
10. Patchwerk
A pure tank-and-heal check. Patchwerk hits the tank who has the most health among those in front of him very hard, and enrages at low health and again as a time limit.
- Put your tanks in a rotation with the highest health first.
- Heal the tanks and the raid hard.
- Damage dealers go all-out on him.
- He enrages at low health (Enrage) and berserks after a time limit (Berserk).
Tank
- His Hateful Strike hits the player with most health among those in melee range: stack health.
- Keep cooldowns ready for Enrage and Berserk.
Healers
- Heal the tanks and the raid: damage is high all fight.
- Expect more damage on the tank during Enrage and Berserk.
Damage dealers
- Don't pull threat.
- Maximum damage to beat the timer.
What wipes groups
- Tank not healed after a Hateful Strike.
- Not enough damage before the berserk.
Abilities
- Enrage (Classic data): Increases the caster's attack speed by 40% and the Physical damage it deals by 25 for 5 min.
- Berserk (Classic data): Increases the caster's attack speed by 150% and the Physical damage it deals by 500 for 5 min.
Tank tips (Classic data)
- Enrage: Patchwerk hits harder below 5% health; save your defensive cooldowns for it.
- Berserk: Patchwerk hits harder; save your defensive cooldowns for it.
Healer tips (Classic data)
- Expect more damage on the tank during Enrage below 5% health.
- Expect more damage on the tank during Berserk.
Loot
- Splinter of Atiesh (Classic data, 30%)
- Desecrated Pauldrons (Classic data, 33%)
- Desecrated Spaulders (Classic data, 33%)
- Desecrated Shoulderpads (Classic data, 33%)
- Band of Reanimation (Classic data, 20%)
11. Grobbulus
A slime that sprays the raid and injects a disease that must be moved out. Tanks and the raid keep moving so the slime spawn can be killed.
- Tank Grobbulus facing away from the raid.
- Anyone injected with the mutating disease runs to the edge of the room.
- When he sprays (Slime Spray) kill the fallout slimes (Summon Fallout Slime) it creates.
- Keep him in melee range so he doesn't use Slime Stream.
Tank
- Face him away from the raid.
- Keep him in melee range: if nobody is, he slimes the raid.
Healers
- Heal injected players out at the edge.
- Heal slime damage on the raid.
Damage dealers
- Kill the fallout slimes (Summon Fallout Slime) quickly.
- If you are injected, leave the group.
What wipes groups
- An injected player staying in the raid.
- Nobody in melee.
Abilities
- Slime Stream (Classic data): Slime nearby targets
- Despawn Boss Adds (Classic data)
- Slime Spray (Classic data)
- Summon Fallout Slime (Classic data)
Loot
- Splinter of Atiesh (Classic data, 30%)
- Desecrated Pauldrons (Classic data, 33%)
- Desecrated Spaulders (Classic data, 33%)
- Desecrated Shoulderpads (Classic data, 33%)
- Icy Scale Spaulders (Classic data, 20%)
- Glacial Mantle (Classic data, 20%)
12. Gluth
Gluth frenzies, decimates the room and eats zombies that arrive in waves. Tanks and kiters handle the zombies while the raid kills the boss.
- Tank Gluth with two tanks swapping.
- Hunters remove his frenzy (Frenzy) with Tranquilizing Shot.
- Kite or kill the zombies (Summon Zombie Chow) before they reach him.
- Prepare for his decimate: it drops every player and zombie to very low health.
Tank
- Swap on his wound debuff.
- Pick up the Zombie Chow that joins about every 60 seconds.
Healers
- After the decimate heal the raid up quickly.
- Keep the tank healers on the tanks.
Damage dealers
- Hunters: keep Tranquilizing Shot ready for Frenzy.
- Kill or crowd-control the Zombie Chow that joins about every 60 seconds.
What wipes groups
- Frenzy not removed.
- Zombies reaching him and healing him.
Abilities
- Zombie Chow Search (Classic data)
- Zombie Chow Search (Classic data)
- Call All Zombie Chow (Classic data)
- Double Attack (Classic data): Gives the caster ? extra attacks.
- Summon Zombie Chow (Classic data)
- Frenzy (Classic data)
Tank tips (Classic data)
- Pick up the Zombie Chow that joins about every 60 sec.
Damage tips (Classic data)
- The Zombie Chow joins about every 60 sec: kill or crowd-control it.
Loot
- Splinter of Atiesh (Classic data, 30%)
- Gluth's Missing Collar (Classic data, 20%)
- Desecrated Pauldrons (Classic data, 8.3%)
- Desecrated Bracers (Classic data, 8.3%)
- Desecrated Waistguard (Classic data, 8.3%)
- Desecrated Sabatons (Classic data, 8.3%)
- Desecrated Spaulders (Classic data, 8.3%)
- Desecrated Wristguards (Classic data, 8.3%)
- Desecrated Girdle (Classic data, 8.3%)
- Desecrated Boots (Classic data, 8.3%)
- Desecrated Shoulderpads (Classic data, 8.3%)
- Desecrated Bindings (Classic data, 8.3%)
13. Thaddius
Two fights in one. First his stalkers Feugen and Stalagg, which must die close together, then Thaddius himself, who swaps the raid's charges so players have to move to the right side.
- Phase 1: tank Feugen and Stalagg in separate places and kill both within a few seconds of each other.
- Phase 2: Thaddius arrives (Thadius Spawn).
- Use the polarity swap: move to the side that matches your charge.
- Kill him before he enrages.
Tank
- Hold each stalker apart from the other.
- Phase 2: tank Thaddius with the main tank.
Healers
- Heal the stalkers' tanks.
- Move to your charge's side when he swaps.
Damage dealers
- Phase 1: kill both stalkers at the same time.
- Phase 2: be on the right side after each swap.
What wipes groups
- Stalkers dying too far apart.
- Players on the wrong side after the swap.
Abilities
- Thadius Spawn (Classic data)
Loot
- Splinter of Atiesh (Classic data, 30%)
- Desecrated Helmet (Classic data, 56%)
- Desecrated Headpiece (Classic data, 56%)
- Desecrated Circlet (Classic data, 56%)
- Eye of Diminution (Classic data, 20%)
14. Sapphiron
A frost dragon fought on the ground and in the air. Frost resistance and line of sight keep the raid alive through his breath. He berserks after a time limit.
- On the ground: tank him facing away from the raid and heal through his frost aura (Frost Aura).
- In the air he breathes (Frost Breath, Frost Breath): hide behind an ice block the moment it forms.
- Spread out on the ground: his wing buffet hits those near him (Summon Sapphiron's Wing Buffet).
- Repeat until he dies or berserks (Berserk).
Tank
- Frost resistance and Frost Protection Potions.
- Face him away from the raid.
- Save cooldowns for Berserk.
Healers
- Heal through Frost Aura on the ground.
- Expect more damage on the tank during Berserk.
Damage dealers
- Get behind an ice block before the breath hits.
- Use frost protection.
What wipes groups
- Nobody hiding behind ice blocks.
- Low frost resistance.
Abilities
- Berserk (Classic data): Increases the caster's attack speed by 150% and the Physical damage it deals by 500 for 5 min.
- Frost Aura (Classic data)
- Double Attack (Classic data): Gives the caster ? extra attacks.
- Summon Sapphiron's Wing Buffet (Classic data)
- Sapphiron's Wing Buffet Despawn (Classic data)
- Dragon Hover (Classic data)
- Frost Breath (Classic data)
- Frost Breath (Classic data)
Tank tips (Classic data)
- Berserk: Sapphiron hits harder; save your defensive cooldowns for it.
Healer tips (Classic data)
- Expect more damage on the tank during Berserk.
Loot
- Power of the Scourge (Classic data, 50%)
- Resilience of the Scourge (Classic data, 50%)
- Might of the Scourge (Classic data, 50%)
- Fortitude of the Scourge (Classic data, 50%)
- Glyph of Deflection (Classic data, 20%)
- Slayer's Crest (Classic data, 20%)
- The Restrained Essence of Sapphiron (Classic data, 20%)
- Eye of the Dead (Classic data, 20%)
15. Kel'Thuzad
The final boss of Naxxramas, fought in three phases. Adds first, then Kel'Thuzad himself with mind control and frost spells, then guardians when his health is low.
- Phase 1: kill the waves of undead that come into the room.
- Phase 2: Kel'Thuzad joins in: kill him as he mind controls players (Chains of Kel'Thuzad) and freezes groups (Frost Blast).
- Use crowd control on mind-controlled players and keep them away from the raid.
- Phase 3: guardians of Icecrown join (Guardian of Icecrown): tank them away from the raid and burn Kel'Thuzad down.
Tank
- Hold the adds in phase 1 and the guardians in phase 3.
- Keep frost resistance up.
Healers
- Frost Blast hits a group: heal them straight away.
- Detonate Mana hurts casters: be ready for the spike.
Damage dealers
- Kill adds fast in phase 1.
- Crowd-control mind-controlled players, never kill them.
- Casters: watch your mana during Detonate Mana.
What wipes groups
- Mind-controlled players killed.
- Guardians loose in phase 3.
Abilities
- Kel'Thuzad Channel (Classic data)
- Kel'Thuzad Channel Effect (Classic data)
- Summon Type D Periodic (Classic data)
- Chains of Kel'Thuzad (Classic data)
- Frost Blast (Classic data)
- Detonate Mana (Classic data)
- Guardian of Icecrown (Classic data)
Loot
- Staff Head of Atiesh (Classic data, 100%)
- The Phylactery of Kel'Thuzad (Classic data, 100%)
- Ring of the Dreadnaught (Classic data, 21%)
- Bonescythe Ring (Classic data, 21%)
- Ring of Faith (Classic data, 21%)
- Frostfire Ring (Classic data, 21%)
- Plagueheart Ring (Classic data, 21%)
- Ring of the Dreamwalker (Classic data, 21%)
- Ring of the Earthshatterer (Classic data, 21%)
- Ring of Redemption (Classic data, 21%)
- Ring of the Cryptstalker (Classic data, 21%)
- Gem of Trapped Innocents (Classic data, 20%)
Quests
Atiesh, the Befouled Greatstaff (level 60)
Anachronos at the Caverns of Time in Tanaris wants the Staff Head of Atiesh and the Base of Atiesh.
Get it from: Anachronos, Tanaris (65.3, 50.0). (Classic data)
Echoes of War (level 60)
Commander Eligor Dawnbringer at Light's Hope Chapel in the Eastern Plaguelands wants you to slay 5 Living Monstrosities, 5 Stoneskin Gargoyles, 8 Deathknight Captains and 3 Venom Stalkers.
Get it from: Commander Eligor Dawnbringer, Eastern Plaguelands (71.7, 48.6). (Classic data)
Glacial Cloak (level 60)
Craftsman Wilhelm at Light's Hope Chapel in the Eastern Plaguelands wants 5 Frozen Runes, 4 Bolts of Runecloth, 2 Essences of Water, 4 Ironweb Spider Silks and 200 gold. You must also be of Exalted reputation with the Argent Dawn.
Get it from: Craftsman Wilhelm, Eastern Plaguelands (71.2, 49.9). (Classic data)
Glacial Gloves (level 60)
Craftsman Wilhelm at Light's Hope Chapel in the Eastern Plaguelands wants 5 Frozen Runes, 4 Bolts of Runecloth, 4 Essences of Water, 2 Ironweb Spider Silks and 200 gold.
Get it from: Craftsman Wilhelm, Eastern Plaguelands (71.2, 49.9). (Classic data)
Glacial Vest (level 60)
Craftsman Wilhelm at Light's Hope Chapel in the Eastern Plaguelands wants 8 Frozen Runes, 8 Bolts of Runecloth, 6 Essences of Water, 4 Ironweb Spider Silks and 300 gold. You must also be of Exalted reputation with the Argent Dawn.
Get it from: Craftsman Wilhelm, Eastern Plaguelands (71.2, 49.9). (Classic data)
Glacial Wrists (level 60)
Craftsman Wilhelm at Light's Hope Chapel in the Eastern Plaguelands wants 4 Frozen Runes, 2 Bolts of Runecloth, 2 Essences of Water, 2 Ironweb Spider Silks and 200 gold.
Get it from: Craftsman Wilhelm, Eastern Plaguelands (71.2, 49.9). (Classic data)
Icebane Bracers (level 60)
Craftsman Wilhelm at Light's Hope Chapel in the Eastern Plaguelands wants 4 Frozen Runes, 12 Thorium Bars, 2 Arcanite Bars, 2 Essence of Water and 200 gold.
Get it from: Craftsman Wilhelm, Eastern Plaguelands (71.2, 49.9). (Classic data)
Icebane Breastplate (level 60)
Craftsman Wilhelm at Light's Hope Chapel in the Eastern Plaguelands wants 8 Frozen Runes, 16 Thorium Bars, 2 Arcanite Bars, 4 Essence of Water and 300 gold. You will also need to be of Exalted reputation with the Argent Dawn.
Get it from: Craftsman Wilhelm, Eastern Plaguelands (71.2, 49.9). (Classic data)
Icebane Gauntlets (level 60)
Craftsman Wilhelm at Light's Hope Chapel in the Eastern Plaguelands wants 5 Frozen Runes, 12 Thorium Bars, 2 Arcanite Bars, 2 Essences of Water and 200 gold.
Get it from: Craftsman Wilhelm, Eastern Plaguelands (71.2, 49.9). (Classic data)
Icy Scale Bracers (level 60)
Craftsman Wilhelm at Light's Hope Chapel in the Eastern Plaguelands wants 4 Frozen Runes, 16 Heavy Scorpid Scales, 5 Essences of Water, 3 Cured Rugged Hides and 200 gold.
Get it from: Craftsman Wilhelm, Eastern Plaguelands (71.2, 49.9). (Classic data)
Icy Scale Breastplate (level 60)
Craftsman Wilhelm at Light's Hope Chapel in the Eastern Plaguelands wants 8 Frozen Runes, 24 Heavy Scorpid Scale, 7 Essence of Water, 5 Cured Rugged Hides and 300 gold. You must also be of Exalted reputation with the Argent Dawn.
Get it from: Craftsman Wilhelm, Eastern Plaguelands (71.2, 49.9). (Classic data)
Icy Scale Gauntlets (level 60)
Craftsman Wilhelm at Light's Hope Chapel in the Eastern Plaguelands wants 5 Frozen Runes, 16 Heavy Scorpid Scale, 5 Essence of Water, 3 Cured Rugged Hides and 200 gold.
Get it from: Craftsman Wilhelm, Eastern Plaguelands (71.2, 49.9). (Classic data)
Omarion's Handbook (level 60)
Take Omarion's Handbook to Craftsman Wilhelm at Light's Hope Chapel in the Eastern Plaguelands.
Get it from: unknown. (Classic data)
Polar Bracers (level 60)
Craftsman Wilhelm at Light's Hope Chapel in the Eastern Plaguelands wants 4 Frozen Runes, 12 Enchanted Leather, 3 Essence of Water, 3 Cured Rugged Hides and 200 gold.
Get it from: Craftsman Wilhelm, Eastern Plaguelands (71.2, 49.9). (Classic data)
Polar Gloves (level 60)
Craftsman Wilhelm at Light's Hope Chapel in the Eastern Plaguelands wants 5 Frozen Runes, 12 Enchanted Leather, 3 Essence of Water, 3 Cured Rugged Hides and 200 gold.
Get it from: Craftsman Wilhelm, Eastern Plaguelands (71.2, 49.9). (Classic data)
Polar Tunic (level 60)
Craftsman Wilhelm at Light's Hope Chapel in the Eastern Plaguelands wants 8 Frozen Runes, 16 Enchanted Leathers, 5 Essences of Water, 5 Cured Rugged Hides and 300 gold. You must also be of Exalted reputation with the Argent Dawn.
Get it from: Craftsman Wilhelm, Eastern Plaguelands (71.2, 49.9). (Classic data)
Ramaladni's Icy Grasp (level 60)
Korfax at Light's Hope Chapel in the Eastern Plaguelands wants you to bring him 1 Frozen Rune, 1 Blue Sapphire and 1 Arcanite Bar.
Get it from: Korfax, Champion of the Light, Eastern Plaguelands (72.0, 48.5). (Classic data)
The Fall of Kel'Thuzad (level 60)
Take the Phylactery of Kel'Thuzad to Light's Hope Chapel in the Eastern Plaguelands.
Get it from: unknown. (Classic data)
The Fate of Ramaladni (level 60)
Enter Naxxramas and uncover the Fate of Ramaladni.
Get it from: Korfax, Champion of the Light, Eastern Plaguelands (72.0, 48.5). (Classic data)
The Only Song I Know... (level 60)
Craftsman Wilhelm at Light's Hope Chapel in the Eastern Plaguelands wants you to bring him 2 Frozen Runes, 2 Essence of Water, 2 Blue Sapphires and 30 gold pieces.
Get it from: Craftsman Wilhelm, Eastern Plaguelands (71.2, 49.9). (Classic data)
The Phylactery of Kel'Thuzad: this item starts a quest.
Videos
- Blizzard Just Changed Leveling & Gold in WoW Forever by HelloJTello
- Azeroth Survivors | Heroic V – Blizzard Is ABSURD! by Grinding Gold Forever
- I Used Eagle Eye to See What Blizzard Is Hiding Behind Stratholme (WoW Forever) by BlizzardPapi
- Azeroth Survivors – Fire Mage GOD MODE! 🔥 | Full Naxxramas Run by Grinding Gold Forever
- Why Can Undead Be Paladins in WoW Forever? The Full Story by Perfect Gaming Weather
- WoW Forever Horizontal Progression: Will Anyone Still Run Old Raids? by WoW Forever Tavern
Other raids for these levels
- Onyxia's Lair (levels 60)
- Zul'Gurub (levels 60)
- Molten Core (levels 60)
- Blackwing Lair (levels 60)
- Ruins of Ahn'Qiraj (levels 60)
- Ahn'Qiraj Temple (levels 60)
Sources
The WoW Forever client (build 1.60.1.70938), what players' ForeverDB addons saw in Forever, Blizzard's posts, and for Classic instances CMaNGOS classic-db (GPL-3.0), labelled Classic data.
Not known yet
- The client's world map has no entrance pin for this instance yet (Map.Corpse is empty).
- No boss models yet: the client doesn't say which creature each boss is.
- No drops seen in Forever yet. The ForeverDB addon records them as you play.
- Dungeon map: boss spots are Classic spawns (CMaNGOS); Forever may have moved them.