

이 페이지는 아직 번역되지 않았습니다. 영어 버전
Blackwing Lair
Blackwing Lair is a level 60 raid in Burning Steppes in World of Warcraft: Forever, with 8 bosses. Not announced for Forever: Blizzard's raid overview of 20 October names three raids for Forever: Barrow Deeps, Hyjal Summit and Onyxia's Lair. This one is in the game files, but Blizzard hasn't said if or when it comes.
Raid. Levels 60–60 (Forever client: group finder). 40 players (Forever client).
Getting there
- Entrance: Burning Steppes (32.5, 32.4) (Forever client)
- Nearest flight master (Alliance): Morgan's Vigil, Burning Steppes
- Nearest flight master (Horde): Flame Crest, Burning Steppes
Map
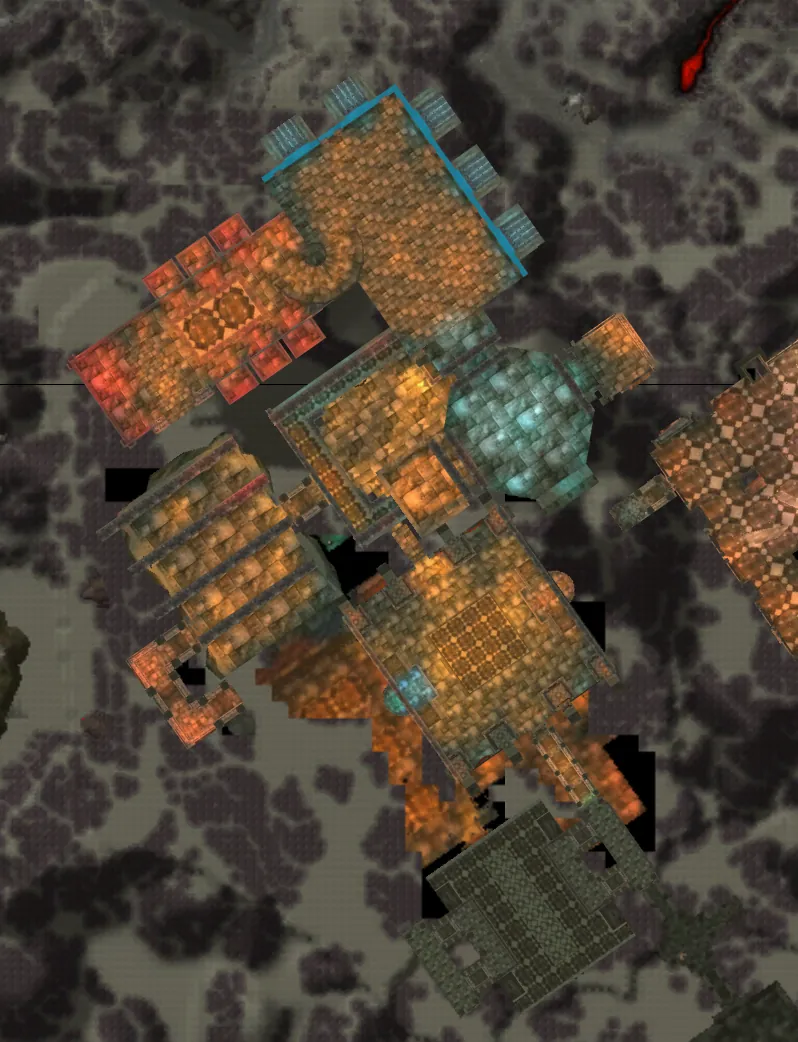
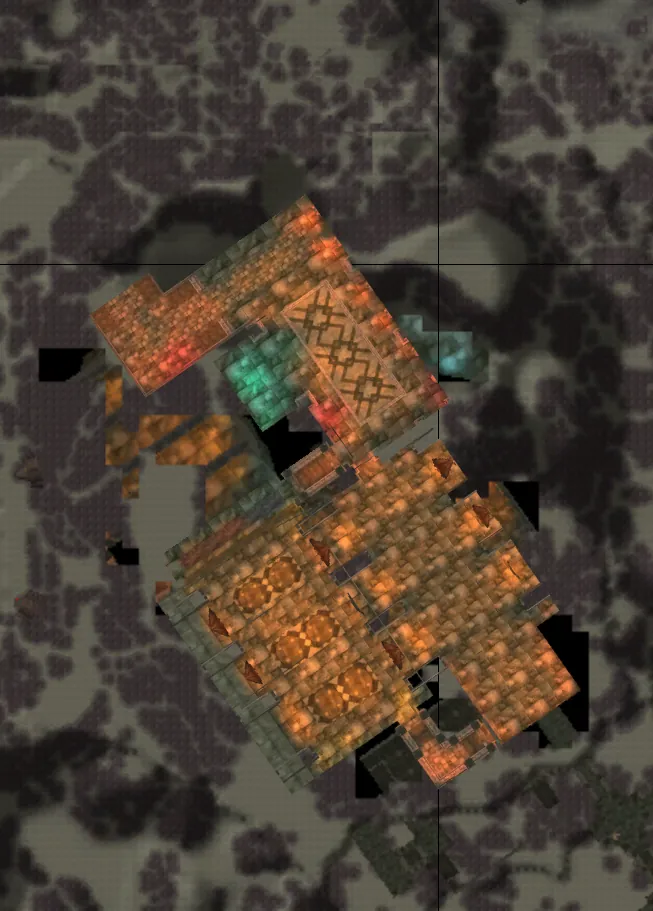
A map of Blackwing Lair with 2 floors (Part 1: Razorgore the Untamed, Vaelastrasz the Corrupt ..., Part 2: Broodlord Lashlayer), stitched from the Forever client's own minimap art (Forever client), with the bosses numbered in the order the client gives (their spots are Classic spawn data until players confirm them in Forever).
The map shows 151 packs of 300 mobs and 22 patrol paths, 24 of the packs marked high danger, with what each pack holds, what to watch for and suggested marks (Classic data from CMaNGOS: Forever may have moved them).
Worth it for: Uther's Strength (top pick for Discipline Priest and 4 more specs at level 50/60); Deepfury Bracers (top pick for Beast Mastery Hunter and 2 more specs at level 50); Guttbuster (top pick for Assassination Rogue and 2 more specs at level 50).
How to run it
How Classic's Blackwing Lair plays, from well-established Classic strategy. Blizzard's raid overview of 20 October names three raids for Forever: Barrow Deeps, Hyjal Summit and Onyxia's Lair. This one is in the game files, but Blizzard hasn't said if or when it comes.
Eight bosses at the top of Blackrock Spire, for 40 level 60 players. Razorgore opens the raid, then come the dragons, Chromaggus and Nefarian. Most fights ask for careful tank swaps, hunters with Tranquilizing Shot and fire or shadow resistance on the tanks.
Before you go
- Level: Level 60, with raid-quality gear. Molten Core gear is the usual standard.
- Group: 40 players: usually 4 to 5 tanks, about 10 healers and the rest damage dealers.
- Getting in: The entrance is in Upper Blackrock Spire. In Classic you need the attunement quest chain to enter.
- Resistance: Fire resistance for tanks on Razorgore and Firemaw, shadow resistance for the tanks on the drakes that use Shadow Flame. Nefarian is easier with shadow resistance across the raid.
- Bring: Fire and shadow protection potions; Flasks or elixirs and food; Healing and mana potions
- Who you need: Hunters with Tranquilizing Shot for Flamegor and Chromaggus; A priest with Fear Ward for Nefarian; Several tanks, so you can swap on Broodlord, Firemaw and Ebonroc
Trash
- Between the bosses there are packs of drakonids and Blackwing mages and technicians: pull them in small groups.
- Clear the room around Broodlord before you pull him, so a knockback doesn't add a pack.
Bosses
8 bosses, in the client's order (Forever client).
1. Razorgore the Untamed
A raider mind-controls Razorgore and uses him to destroy the dragon eggs in the room, while the rest of the raid kills the adds that spawn. When every egg is gone, he is free and the raid kills him.
- One player takes control of Razorgore with the Orb of Domination (Possess) and uses him to destroy the eggs.
- The rest of the raid holds off the adds that spawn as eggs break.
- If control ends, take it again and keep destroying eggs.
- When every egg is destroyed, Razorgore breaks free: tank him and kill him.
Tank
- Hold the adds away from the raid, each in its own place.
- Once Razorgore is free, he uses Cleave and War Stomp: face him away from the raid.
- Conflagration sets a player on fire and makes them panic: fire resistance helps.
Healers
- The raid takes damage from Fireball Volley and from the adds: stay spread and keep everyone up.
- Conflagration deals 3000 fire damage over 10 seconds: heal the target through it.
Damage dealers
- Kill the add on the tank first, then the next.
- Don't stand in front of Razorgore once he is free: War Stomp stuns.
What wipes groups
- Adds overwhelming the raid while eggs are still unbroken.
- Losing control of Razorgore with eggs left.
Abilities
- Conflagration (Classic data): Sets an enemy aflame, inflicting 3000 Fire damage over 10 sec. and sending it into a state of panic. While the target is affected, the flames periodically scorch its nearby allies for 300 damage as well.
- Fireball Volley (Classic data): Inflicts Fire damage to nearby enemies.
- War Stomp (Classic data): Inflicts normal damage plus 500 to nearby enemies, knocking them back and stunning them for 5 sec.
- Cleave (Classic data): Inflicts normal damage plus 300 to an enemy and its nearest allies, affecting up to 10 targets. (Numbers at level 60; they grow with your level.)
- Double Attack (Classic data): Gives the caster ? extra attacks.
- Possess (Classic data)
- Warming Flames (Classic data)
Tank tips (Classic data)
- Face Razorgore the Untamed away from the group: Conflagration hits a 60° cone in front of it about every 20 sec.
- Face Razorgore the Untamed away from the group: Cleave hits a 90° cone in front of it about every 6 sec.
- Pick up the Grethok the Controller that joins when the fight starts.
Healer tips (Classic data)
- Fireball Volley damages the whole group about every 18 sec.
- War Stomp hits everyone within 15 yards about every 30 sec.
Damage tips (Classic data)
- Attack from behind or the side (Conflagration hits in front).
- Attack from behind or the side (Cleave hits in front).
- The Grethok the Controller joins when the fight starts: kill or crowd-control it.
Loot
- Arcane Infused Gem (Classic data, 17%)
- The Black Book (Classic data, 17%)
2. Vaelastrasz the Corrupt
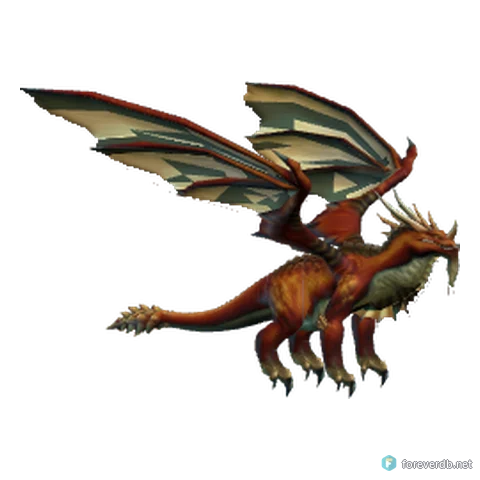
Vaelastrasz starts at 30% health and gives the raid Essence of the Red: no limit on mana, rage or energy for a short time. It's a race: Burning Adrenaline goes on a random mana user and on the main tank in turn, and kills them, exploding in the raid if they don't run out.
- Talk to him to start; while Essence of the Red lasts, use everything you have.
- Whoever gets Burning Adrenaline runs out of the raid at once and dies there.
- Tank him facing away from the raid (Flame Breath) and stay off his tail (Tail Sweep).
Tank
- Set a tank order: each tank gets Burning Adrenaline in turn and dies, and the next taunts at once.
Healers
- Heal freely while Essence of the Red lasts: mana doesn't run out.
- A player with Burning Adrenaline can't be saved: heal the rest.
Damage dealers
- Burn him from the start: he begins at 30% health.
- If you get Burning Adrenaline, run out of the raid straight away.
What wipes groups
- Burning Adrenaline exploding inside the raid.
- Running out of tanks before he dies.
Abilities
- Burning Adrenaline (Classic data)
- Burning Adrenaline (Classic data)
- Flame Breath (Classic data): Inflicts 3500 to 4500 Fire damage to enemies in a cone in front of the caster.
- Fire Nova (Classic data): Inflicts Fire damage to nearby enemies.
- Cleave (Classic data): Inflicts normal damage plus 300 to an enemy and its nearest allies, affecting up to 10 targets. (Numbers at level 60; they grow with your level.)
- Tail Sweep (Classic data): Inflicts 600 to 1000 damage on enemies in a cone behind the caster, knocking them back.
- Essence of the Red (Classic data)
- Corruption (Classic data)
- Majordomo Teleport Visual (Classic data)
Tank tips (Classic data)
- Face Vaelastrasz the Corrupt away from the group: Flame Breath hits a 120° cone in front of it about every 6 sec.
- Face Vaelastrasz the Corrupt away from the group: Cleave hits a 90° cone in front of it about every 15 sec.
Healer tips (Classic data)
- Fire Nova damages the whole group about every 5 sec.
Damage tips (Classic data)
- Attack from behind or the side (Flame Breath hits in front).
- Attack from behind or the side (Cleave hits in front).
- Don't stand behind Vaelastrasz the Corrupt: Tail Sweep hits behind it.
Loot
- Mind Quickening Gem (Classic data, 17%)
- Rune of Metamorphosis (Classic data, 17%)
- Pendant of the Fallen Dragon (Classic data, 17%)
3. Broodlord Lashlayer
A tank-and-spank with a Mortal Strike that cuts healing in half, so tanks swap. Clear the room around him before you pull.
- Pull him where the tank won't be knocked back into other packs.
- Tanks swap as Mortal Strike stacks, so one is always at full healing.
- Melee stay out of Blast Wave range if you can.
Tank
- Mortal Strike cuts healing on you by half: swap with a second tank.
- Knock Away throws you back: stand where it won't pull another pack.
Healers
- Heal the tank taking Mortal Strike and top up before the swap.
- The melee take damage from Blast Wave and Cleave.
Damage dealers
- Stay behind him and out of Cleave.
- Melee: expect Blast Wave and run back in.
What wipes groups
- A tank held on Mortal Strike too long.
- Being knocked back into an unpulled pack.
Abilities
- Cleave (Classic data): Inflicts weapon damage plus 60 to an enemy and its nearest allies, affecting up to 3 targets. (Numbers at level 60; they grow with your level.)
- Knock Away (Classic data): Inflicts normal damage plus 30 to an enemy and knocks it back.
- Blast Wave (Classic data): Unleashes a wave of flame, inflicting Fire damage to nearby enemies and reducing their movement speed for 8 sec.
- Mortal Strike (Classic data): Inflicts 500% weapon damage and leaves the target wounded, reducing the effectiveness of any healing by 50% for 5 sec.
Tank tips (Classic data)
- Face Broodlord Lashlayer away from the group: Cleave hits a 90° cone in front of it about every 7 sec.
- Knock Away knocks the tank back about every 22 sec: stand with your back to a wall.
Healer tips (Classic data)
- Blast Wave hits everyone within 20 yards about every 12 sec.
- Mortal Strike hits the tank about every 30 sec.
Damage tips (Classic data)
- Attack from behind or the side (Cleave hits in front).
Loot
- Head of the Broodlord Lashlayer (Classic data, 100%)
- Lifegiving Gem (Classic data, 17%)
- Venomous Totem (Classic data, 17%)
4. Firemaw
A drake that breathes shadow fire in a cone, buffets with his wings and stacks fire damage on the tank. Tanks swap before the stack gets too high.
- Tank him facing away from the raid, with a second tank ready.
- Melee and ranged stay behind or beside him, never in front.
- Swap tanks when Flame Buffet stacks get high.
Tank
- Flame Buffet raises the fire damage you take: fire resistance helps, and swap before the stack gets high.
- Wing Buffet knocks you back: pick him up again at once.
Healers
- Shadow Flame hits everyone in a cone: heal anyone caught in it.
- The tank takes more fire damage with each stack: keep them topped up.
Damage dealers
- Stay out of his front: Shadow Flame and Wing Buffet.
- Hold off for a moment after a tank swap so you don't pull threat.
What wipes groups
- Tanks left on the stack for too long.
- Anyone in front of him when the cone goes out.
Abilities
- Shadow Flame (Classic data): Inflicts 3938 to 5062 Shadow damage to enemies in a cone in front of the caster.
- Wing Buffet (Classic data): Inflicts 563 to 937 damage to enemies in a cone in front of the caster, knocking them back.
- Flame Buffet (Classic data): Inflicts 139 to 161 Fire damage to an enemy and increases the Fire damage it takes by 150 for 20 sec.
- Thrash (Classic data): Gives the caster 2 extra attacks.
Tank tips (Classic data)
- Face Firemaw away from the group: Shadow Flame hits a 120° cone in front of it about every 16 sec.
- Face Firemaw away from the group: Wing Buffet hits a 120° cone in front of it about every 32 sec.
Healer tips (Classic data)
- Flame Buffet damages the whole group about every 5 sec.
Damage tips (Classic data)
- Attack from behind or the side (Shadow Flame hits in front).
- Attack from behind or the side (Wing Buffet hits in front).
Loot
- Rejuvenating Gem (Classic data, 14%)
- Ring of Blackrock (Classic data, 14%)
- Scrolls of Blinding Light (Classic data, 12%)
- Natural Alignment Crystal (Classic data, 12%)
5. Ebonroc
A drake with the same cone and buffets as Firemaw. His tank gets a debuff that heals him whenever he hits them, so tanks swap when it appears.
- Tank him facing away from the raid, with a second tank ready.
- When the tank gets Shadow of Ebonroc, the other tank takes him.
- Stay out of his front.
Tank
- Shadow of Ebonroc heals him whenever he hits you: swap when you have it.
- Wing Buffet knocks you back: taunt him back.
Healers
- Heal the tank and the raid through Shadow Flame.
- The tank with Shadow of Ebonroc needs steady healing until the swap.
Damage dealers
- Stay out of his front.
- Don't pull threat right after a swap: let the new tank build some.
What wipes groups
- Not swapping on Shadow of Ebonroc, so he keeps healing.
- Anyone standing in the cone.
Abilities
- Shadow of Ebonroc (Classic data)
- Shadow Flame (Classic data): Inflicts 3938 to 5062 Shadow damage to enemies in a cone in front of the caster.
- Wing Buffet (Classic data): Inflicts 563 to 937 damage to enemies in a cone in front of the caster, knocking them back.
- Thrash (Classic data): Gives the caster 2 extra attacks.
Tank tips (Classic data)
- Face Ebonroc away from the group: Shadow Flame hits a 120° cone in front of it about every 16 sec.
- Face Ebonroc away from the group: Wing Buffet hits a 120° cone in front of it about every 32 sec.
Damage tips (Classic data)
- Attack from behind or the side (Shadow Flame hits in front).
- Attack from behind or the side (Wing Buffet hits in front).
Loot
- Aegis of Preservation (Classic data, 18%)
- Band of Forced Concentration (Classic data, 18%)
- Drake Fang Talisman (Classic data, 18%)
- Rejuvenating Gem (Classic data, 14%)
- Ring of Blackrock (Classic data, 14%)
6. Flamegor
The last of the three drakes. He has a Frenzy that hunters remove with Tranquilizing Shot, and the same cone and buffets as the others.
- Tank him facing away from the raid.
- Hunters use Tranquilizing Shot on every Frenzy.
- Stay out of his front.
Tank
- Frenzy raises his attack speed: a missed Tranquilizing Shot hurts you, so tell the hunters.
- Wing Buffet knocks you back: taunt him back.
Healers
- Shadow Flame hits anyone in the cone: heal through it.
- The tank takes more damage during Frenzy: watch their health.
Damage dealers
- Hunters: set up a Tranquilizing Shot order and call it.
- Stay out of his front.
What wipes groups
- Missed Tranquilizing Shots, so the frenzy stays up and the tank dies.
- Anyone in front of him.
Abilities
- Frenzy (Classic data)
- Shadow Flame (Classic data): Inflicts 3938 to 5062 Shadow damage to enemies in a cone in front of the caster.
- Wing Buffet (Classic data): Inflicts 563 to 937 damage to enemies in a cone in front of the caster, knocking them back.
- Thrash (Classic data): Gives the caster 2 extra attacks.
Tank tips (Classic data)
- Frenzy: Flamegor hits harder; save your defensive cooldowns for it.
- Face Flamegor away from the group: Shadow Flame hits a 120° cone in front of it about every 16 sec.
- Face Flamegor away from the group: Wing Buffet hits a 120° cone in front of it about every 32 sec.
Healer tips (Classic data)
- Expect more damage on the tank during Frenzy.
Damage tips (Classic data)
- Attack from behind or the side (Shadow Flame hits in front).
- Attack from behind or the side (Wing Buffet hits in front).
Loot
- Styleen's Impeding Scarab (Classic data, 20%)
- Circle of Applied Force (Classic data, 20%)
- Rejuvenating Gem (Classic data, 14%)
- Ring of Blackrock (Classic data, 14%)
7. Chromaggus
A two-headed hound with two breaths, picked each raid week from five, and Brood Affliction that stacks five kinds of affliction on the raid. A player with all five turns into a hostile drake, so afflictions must be cured all fight.
- Tank him round the corner of the gate so the raid can hide behind the wall when he breathes.
- Find out which two breaths he has this week and hide from each.
- Cure the afflictions as they land: the bronze one needs Hourglass Sand, the others are cured as magic, disease, poison or curse.
- Hunters remove Frenzy with Tranquilizing Shot; near the end he enrages, so burn him.
Tank
- Keep him where the raid can hide behind the wall when he breathes.
Healers
- Cure afflictions all fight: nobody may end up with all five.
- Carry Hourglass Sand for the bronze affliction.
Damage dealers
- Hide behind the wall for every breath.
- Hunters: Tranquilizing Shot on every frenzy.
What wipes groups
- A player with all five afflictions turning into a drake.
- The raid in the open when he breathes.
Abilities
- Enrage (Classic data): Increases the caster's attack speed by 50% and the Physical damage it deals by 219 to 281 for 10 min.
- Elemental Shield (Classic data)
- Brood Affliction (Classic data)
- Frenzy (Classic data)
- Dragondog Breath Selection (Classic data)
Tank tips (Classic data)
- Enrage: Chromaggus hits harder below 20% health; save your defensive cooldowns for it.
- Frenzy: Chromaggus hits harder; save your defensive cooldowns for it.
Healer tips (Classic data)
- Expect more damage on the tank during Enrage below 20% health.
- Expect more damage on the tank during Frenzy.
Loot
- Girdle of the Fallen Crusader (Classic data, 16%)
8. Nefarian
Nefarian has three phases. First drakonids arrive while he sits on the balcony. Then he lands and fights the tanks. At the end he raises the dead drakonids and gives each class a call.
- Phase 1: kill the drakonids as they arrive, tanked and burned down in groups.
- Phase 2: Nefarian lands. Tank him away from the raid and use Fear Ward and Tremor Totem for Bellowing Roar.
- Phase 3: he raises the dead drakonids with Raise Drakonids and calls on classes. Kill him quickly.
Tank
- He uses Shadow Flame, Tail Lash and Cleave: face him away from the raid.
- Bellowing Roar fears: use Fear Ward.
- Veil of Shadow cuts healing on you by 75% for 6 seconds: have a second tank ready.
Healers
- Veil of Shadow cuts healing by 75% for 6 seconds: heal around it.
- Some class calls target healers, such as Corrupted Healing for priests and Siphon Blessing for paladins: be ready.
Damage dealers
- Class calls hit each class differently, such as Berserk for warriors, Summon Infernals for warlocks and Corrupted Totems for shamans.
- Stay out of his front and away from Shadow Flame.
What wipes groups
- No Fear Ward or Tremor Totem for his tank.
- Class calls left to play out with the raid unprepared.
- Phase 1 adds overwhelming the tanks.
Abilities
- Raise Drakonids (Classic data)
- Shadow Flame (Classic data): Inflicts 3938 to 5062 Shadow damage to enemies in a cone in front of the caster.
- Bellowing Roar (Classic data)
- Veil of Shadow (Classic data): Reduces healing effects for an enemy by 75% for 6 sec.
- Cleave (Classic data): Inflicts normal damage plus 300 to an enemy and its nearest allies, affecting up to 10 targets. (Numbers at level 60; they grow with your level.)
- Tail Lash (Classic data)
- Speed Burst (Classic data)
- Double Attack (Classic data): Gives the caster ? extra attacks.
- Shadow Flame (Classic data)
- Berserk (Classic data)
- Siphon Blessing (Classic data)
- Corrupt Weapon (Classic data)
- Paralyze (Classic data)
- Corrupted Healing (Classic data)
- Corrupted Totems (Classic data)
- Wild Magic (Classic data)
- Summon Infernals (Classic data)
- Involuntary Transformation (Classic data)
Loot
- Head of Nefarian (Classic data, 100%)
- Head of Nefarian (Classic data, 100%)
- Red Scepter Shard (Classic data, 100%)
- Archimtiros' Ring of Reckoning (Classic data, 20%)
- Prestor's Talisman of Connivery (Classic data, 20%)
- Neltharion's Tear (Classic data, 20%)
- Pure Elementium Band (Classic data, 20%)
- Plans: Lionheart Helm (Classic data, 2.5%)
- Plans: Stronghold Gauntlets (Classic data, 2.5%)
- Pattern: Invulnerable Mail (Classic data, 2.5%)
- Pattern: Gloves of Spell Mastery (Classic data, 2.5%)
- Plans: Titanic Leggings (Classic data, 2.5%)
Loot from the dungeon
- Elementium Ore (Classic data)
- Band of Dark Dominion (Classic data)
Quests
Nefarius's Corruption (level 60)
Slay Nefarian and recover the Red Scepter Shard. Return the Red Scepter Shard to Anachronos at the Caverns of Time in Tanaris. You have 5 hours to complete this task.
Get it from: Vaelastrasz the Corrupt. (Classic data)
Only One May Rise (level 60)
Return the Head of the Broodlord Lashlayer to Baristolth of the Shifting Sands at Cenarion Hold in Silithus.
Get it from: Baristolth of the Shifting Sands, Silithus (49.5, 36.4). (Classic data)
Head of Nefarian: this item starts a quest.
Head of Nefarian: this item starts a quest.
Videos
- Do These 5 Things NOW To Prepare for WoW Forever by Ebonhardt
- What Comes After Launch in WoW Forever? by Mykrin
- Gilneas Is Already in WoW Forever (and Everything Else Blizzard Plans After Launch) by Forever Crossroads
- WoW Forever Horizontal Progression: Will Anyone Still Run Old Raids? by WoW Forever Tavern
Other raids for these levels
- Onyxia's Lair (levels 60)
- Zul'Gurub (levels 60)
- Molten Core (levels 60)
- Ruins of Ahn'Qiraj (levels 60)
- Ahn'Qiraj Temple (levels 60)
- Naxxramas (levels 60)
Sources
The WoW Forever client (build 1.60.1.70938), what players' ForeverDB addons saw in Forever, Blizzard's posts, and for Classic instances CMaNGOS classic-db (GPL-3.0), labelled Classic data.
Not known yet
- No drops seen in Forever yet. The ForeverDB addon records them as you play.
- Dungeon map: boss spots are Classic spawns (CMaNGOS); Forever may have moved them.