

이 페이지는 아직 번역되지 않았습니다. 영어 버전
Sunken Temple
Sunken Temple is a level 50–60 dungeon in Swamp of Sorrows in World of Warcraft: Forever, with 8 bosses.
Dungeon. Levels 50–60 (Forever client: group finder). 5 players (Forever client). Enter from level 45.
Getting there
- Entrance: Swamp of Sorrows (77.3, 35.9) (Forever client)
- Nearest flight master (Horde): Stonard, Swamp of Sorrows
Map
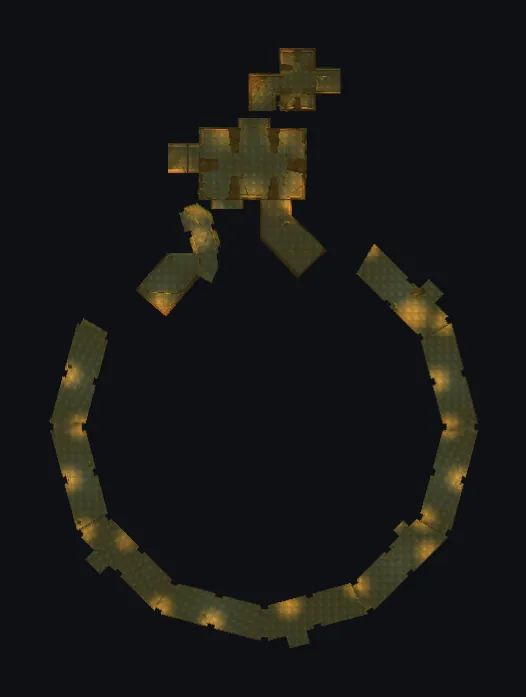
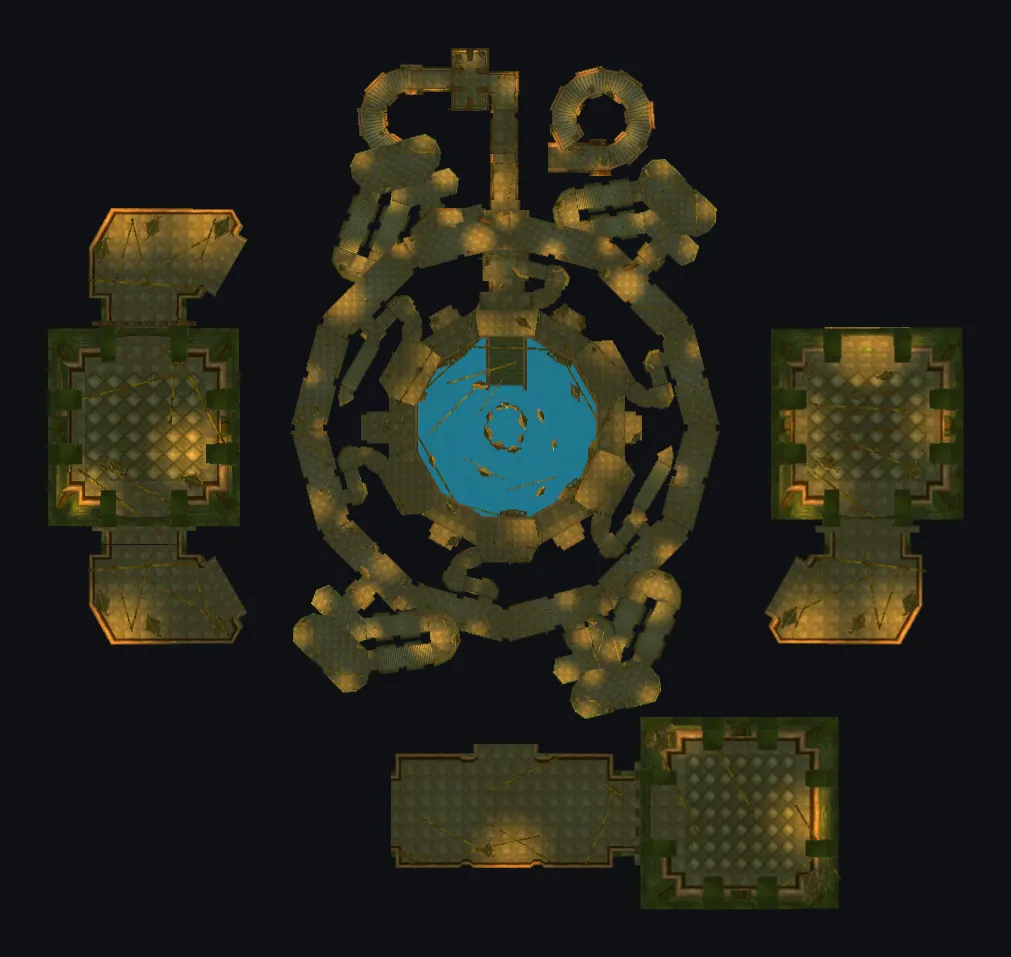
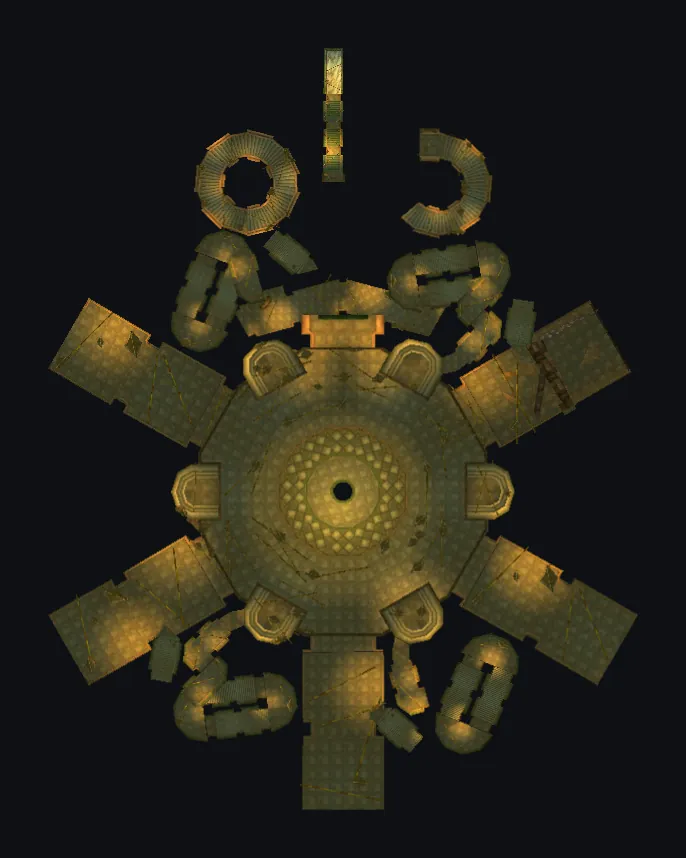
A map of Sunken Temple with 3 floors (Part 1, Part 2: Shade of Eranikus, Hazzas ..., Part 3), stitched from the Forever client's own minimap art (Forever client), with the bosses numbered in the order the client gives (their spots are Classic spawn data until players confirm them in Forever).
The map shows 60 packs of 152 mobs and 0 patrol paths, 11 of the packs marked high danger, with what each pack holds, what to watch for and suggested marks (Classic data from CMaNGOS: Forever may have moved them).
Worth it for: Might of Hakkar (top pick for Protection Paladin and 1 more spec at level 50); Warrior's Embrace (top pick for Protection Paladin and 1 more spec at level 50); Nightfall Drape (top pick for Affliction Warlock and 1 more spec at level 50).
How to run it
How Classic's Sunken Temple plays, from well-established Classic strategy. It is not yet checked against Forever's own version of the fights.
A troll temple on an island in the Swamp of Sorrows, run by a group of five in the high 40s to 50s. Most of the bosses hit in a cone in front of them or stun the tank, so the group is mainly about facing them away, removing debuffs and keeping an eye out for mind control.
Before you go
- Level: Level 50 to 60 in Classic, with 45 the lowest level that can enter. Level 52 or higher makes the trash a lot easier.
- Group: 5 players.
- Getting in: The entrance is on the island in the Swamp of Sorrows. Stonard is the nearest Horde flight point.
- Bring: Food and a flask or elixirs for the tank and healer
- Who you need: One tank with decent health: the dragons and the Shade hit hard; One healer, ideally one who can remove curses or magic; Crowd control for the adds: a mage, warlock or rogue; A priest, paladin or druid who can dispel is worth a place
- Also: In Classic you light the six Atal'ai statues in a set order to call Atal'alarion. The boss notes below are written per boss, not in route order.
Trash
- The Atal'ai trolls come in packs of casters and melee: crowd-control the casters and kill the melee first.
- Pull in small groups and back into a corridor so that the group fights one pack at a time.
- Rest after each pack: the long fights with the dragons need a full mana bar.
Bosses
8 bosses, in the client's order (Forever client).
1. Atal'alarion
A giant troll who wakes when the statues are lit. He hits the tank hard and stuns the whole group at intervals.
- Light the statues in the right order to call him, then pull him to open ground.
- Tank him with his front turned away from the group.
- Kill him: it is a straight damage race and the main risk is the tank dropping during a stun.
Tank
- Face him away from the group: Sweeping Slam hits everyone in the cone and knocks them back.
- Use a cooldown if your healer is low: you cannot be healed during a stun.
Healers
- Ground Tremor stuns everyone for a moment about every half minute: heal through it, you can't remove it.
- Top up the tank just before the stun.
Damage dealers
- Stay behind or beside him so that Sweeping Slam misses you.
- Don't pull the nearby trolls: kill or avoid them before you light the statues.
What wipes groups
- A pull that brings the statue guards too, or a tank who was low when the stun landed.
Abilities
- Sweeping Slam (Classic data): Inflicts normal damage plus 50 to enemies in a cone in front of the caster, knocking them back.
- Ground Tremor (Classic data): Stuns nearby enemies, rendering them unable to move or attack for 2 sec.
Tank tips (Classic data)
- Face Atal'alarion away from the group: Sweeping Slam hits a 90° cone in front of it about every 32 sec.
Healer tips (Classic data)
- Ground Tremor stuns everyone for 2 sec about every 26 sec. It can't be removed: heal through it.
Damage tips (Classic data)
- Attack from behind or the side (Sweeping Slam hits in front).
Loot
- Atal'alarion's Tusk Ring (Classic data, 40%)
- Darkwater Bracers (Classic data, 40%)
- Headspike (Classic data, 20%)
- Putrid Vine (Classic data, 100%)
- Fetish of Hakkar (Classic data, 40%)
2. Avatar of Hakkar
An avatar of the blood god Hakkar. He curses the group and stuns the tank, and one of his abilities turns a player against the rest.
- Get the group into position and use crowd control on his adds before you start on him.
- Keep the tank healed and remove curses between casts.
- When a player is mind controlled, crowd-control them instead of attacking.
Tank
- Lash stuns you for a short moment and can disarm you: ask for healing before it lands.
- Don't taunt a mind-controlled player: stay on the boss.
Healers
- Curse of Tongues slows spell casting on everyone: remove it if you can.
- Be ready for a big heal when Lash lands on the tank.
Damage dealers
- Cause Insanity takes control of a player for a few seconds: crowd-control them (sheep, fear, trap) rather than killing them.
- Mages and warlocks, keep your cast times in mind while the curse is on you.
What wipes groups
- Killing a mind-controlled player, or a tank dying under the stun and disarm.
Abilities
- Curse of Tongues (Classic data): Forces nearby enemies to speak in Demonic, reducing their casting speed by 50% for 15 sec. Only one curse per warlock can be active on any one target.
- Lash (Classic data): Stuns an enemy for 2 sec. and has a chance to disarm.
- Cause Insanity (Classic data): Drives an enemy target temporarily insane, speeding its attacks by 50% and its movement by 80%, as well as causing it to attack its own allies for 6 sec.
Healer tips (Classic data)
- Curse of Tongues puts a curse debuff on everyone about every 25 sec: remove it if your class can.
- Lash stuns the tank for 2 sec about every 18 sec. It can't be removed: keep the tank topped up.
Damage tips (Classic data)
- Cause Insanity takes control of a player for 6 sec: crowd-control them rather than hurting them.
Loot
- Windscale Sarong (Classic data, 40%)
- Featherskin Cape (Classic data, 40%)
- Warrior's Embrace (Classic data, 40%)
- Bloodshot Greaves (Classic data, 40%)
- Might of Hakkar (Classic data, 20%)
- Spire of Hakkar (Classic data, 20%)
- Essence of Hakkar (Classic data, 100%)
3. Shade of Eranikus
The Shade of the fallen green dragon. He puts people to sleep and hits the group in front of him with breath. His whelps and wanderers join the fight at the start.
- The tank takes the Shade and the off-tank, or crowd control, takes his adds.
- Kill the adds that join at the start before you push the Shade's health low.
- Stay out of the front cone.
Tank
- Keep him facing away from the group: Acid Breath hits everyone in front of him.
- Pick up the Nightmare Whelp and the other adds that join when the fight starts.
Healers
- Deep Slumber puts the tank to sleep for a moment and makes them untouchable: remove it if you can.
- War Stomp hits everyone near him: heal the group after it.
Damage dealers
- Ranged: stay over 5 yards away so that War Stomp doesn't catch you.
- Kill or crowd-control the Nightmare Whelp and Hazzas when they join.
What wipes groups
- Adds left loose on the healer, or the tank sleeping with nobody ready to taunt.
Abilities
- Deep Slumber (Classic data): Lulls an enemy into a deep sleep for 15 sec., rendering it unable to act, but also making it invulnerable.
- War Stomp (Classic data): Inflicts normal damage plus 31 to nearby enemies, knocking them back and stunning them for 5 sec. (Numbers at level 60; they grow with your level.)
- Acid Breath (Classic data): Inflicts 600 Nature damage and an additional 46 damage every 5 sec. to enemies in a cone in front of the caster. Lasts 45 sec. (Numbers at level 60; they grow with your level.)
Tank tips (Classic data)
- Face Shade of Eranikus away from the group: Acid Breath hits a 60° cone in front of it about every 25 sec.
- Pick up the Nightmare Whelp that joins when the fight starts.
- Pick up the Hazzas that joins when the fight starts.
- Pick up the Nightmare Wanderer that joins when the fight starts.
Healer tips (Classic data)
- Deep Slumber puts a magic debuff on the tank about every 30 sec: remove it if your class can.
- War Stomp hits everyone within 5 yards about every 20 sec.
Damage tips (Classic data)
- Ranged: stay more than 5 yards away (War Stomp).
- Attack from behind or the side (Acid Breath hits in front).
- The Nightmare Whelp joins when the fight starts: kill or crowd-control it.
- The Hazzas joins when the fight starts: kill or crowd-control it.
Loot
- Dragon's Eye (Classic data, 40%)
- Horns of Eranikus (Classic data, 40%)
- Crest of Supremacy (Classic data, 40%)
- Rod of Corrosion (Classic data, 40%)
- Dire Nail (Classic data, 20%)
- Tooth of Eranikus (Classic data, 20%)
- Essence of Eranikus (Classic data, 100%)
4. Hazzas
One of the four green dragons in the temple's central halls. A tank-and-spank fight with a breath and a knock-back in front.
- Pull him alone, to a corner or wall.
- Tank him with his front turned away from the group.
- Kill him, then rest before you move on to the next dragon.
Tank
- Face him away from the group: Acid Breath and Wing Flap both hit the cone in front.
- Stand with a wall behind you so that you aren't knocked into other packs.
Healers
- Acid Breath leaves a nature damage over time on the tank: keep it healed.
Damage dealers
- Stay behind or beside him: Wing Flap knocks back whoever stands in front.
What wipes groups
- A knock-back into another pack.
Abilities
- Acid Breath (Classic data): Inflicts 305 Nature damage and an additional 20 damage every 5 sec. to enemies in a cone in front of the caster. Lasts 45 sec. (Numbers at level 60; they grow with your level.)
- Wing Flap (Classic data): Strikes enemies in a cone in front of the caster, knocking them back.
Tank tips (Classic data)
- Face Hazzas away from the group: Acid Breath hits a 60° cone in front of it about every 12 sec.
- Face Hazzas away from the group: Wing Flap hits a 90° cone in front of it about every 20 sec.
Damage tips (Classic data)
- Attack from behind or the side (Acid Breath hits in front).
- Attack from behind or the side (Wing Flap hits in front).
Loot
- Drakeclaw Band (Classic data, 6.2%)
- Drakestone (Classic data, 6.2%)
- Firebreather (Classic data, 6.2%)
- Smoldering Claw (Classic data, 6.2%)
- Drakefang Butcher (Classic data, 6.2%)
- Bloodfire Talons (Classic data, 6.2%)
- Nightfall Drape (Classic data, 6.2%)
- Dawnspire Cord (Classic data, 6.2%)
5. Morphaz
Another green dragon with the same two attacks. Treat it the same way as Hazzas.
- Pull him alone, to a corner or wall.
- Tank him with his front turned away from the group.
- Kill him and rest before the next dragon.
Tank
- Face him away from the group: Acid Breath and Wing Flap both hit the cone in front.
Healers
- The tank takes a nature damage over time from Acid Breath: keep it topped up.
Damage dealers
- Stay behind or beside him: Wing Flap knocks back whoever stands in front.
What wipes groups
- A knock-back into another pack.
Abilities
- Acid Breath (Classic data): Inflicts 305 Nature damage and an additional 20 damage every 5 sec. to enemies in a cone in front of the caster. Lasts 45 sec. (Numbers at level 60; they grow with your level.)
- Wing Flap (Classic data): Strikes enemies in a cone in front of the caster, knocking them back.
Tank tips (Classic data)
- Face Morphaz away from the group: Acid Breath hits a 60° cone in front of it about every 12 sec.
- Face Morphaz away from the group: Wing Flap hits a 90° cone in front of it about every 20 sec.
Damage tips (Classic data)
- Attack from behind or the side (Acid Breath hits in front).
- Attack from behind or the side (Wing Flap hits in front).
Loot
- Drakeclaw Band (Classic data, 6.2%)
- Drakestone (Classic data, 6.2%)
- Firebreather (Classic data, 6.2%)
- Smoldering Claw (Classic data, 6.2%)
- Drakefang Butcher (Classic data, 6.2%)
- Bloodfire Talons (Classic data, 6.2%)
- Nightfall Drape (Classic data, 6.2%)
- Dawnspire Cord (Classic data, 6.2%)
- Tooth of Morphaz (Classic data, 100%)
- Azure Key (Classic data, 100%)
- Blood of Morphaz (Classic data, 100%)
- Arcane Shard (Classic data, 100%)
6. Weaver
A green dragon with a breath and a wing flap. The same as the other dragons: face him away and stay at the side.
- Pull him alone, to a corner or wall.
- Tank him with his front turned away from the group.
- Kill him and rest before the next dragon.
Tank
- Face him away from the group: Acid Breath and Wing Flap both hit the cone in front.
Healers
- The tank takes a nature damage over time from Acid Breath: keep it topped up.
Damage dealers
- Stay behind or beside him: Wing Flap knocks back whoever stands in front.
What wipes groups
- A knock-back into another pack.
Abilities
- Acid Breath (Classic data): Inflicts 305 Nature damage and an additional 20 damage every 5 sec. to enemies in a cone in front of the caster. Lasts 45 sec. (Numbers at level 60; they grow with your level.)
- Wing Flap (Classic data): Strikes enemies in a cone in front of the caster, knocking them back.
Tank tips (Classic data)
- Face Weaver away from the group: Acid Breath hits a 60° cone in front of it about every 12 sec.
- Face Weaver away from the group: Wing Flap hits a 90° cone in front of it about every 20 sec.
Damage tips (Classic data)
- Attack from behind or the side (Acid Breath hits in front).
- Attack from behind or the side (Wing Flap hits in front).
Loot
- Drakeclaw Band (Classic data, 6.2%)
- Drakestone (Classic data, 6.2%)
- Firebreather (Classic data, 6.2%)
- Smoldering Claw (Classic data, 6.2%)
- Drakefang Butcher (Classic data, 6.2%)
- Bloodfire Talons (Classic data, 6.2%)
- Nightfall Drape (Classic data, 6.2%)
- Dawnspire Cord (Classic data, 6.2%)
7. Dreamscythe
The fourth of the green dragons, with the same breath and wing flap. Don't relax: the group is probably low on mana by now.
- Rest to full mana before you pull.
- Tank him with his front turned away from the group.
- Kill him.
Tank
- Face him away from the group: Acid Breath and Wing Flap both hit the cone in front.
Healers
- The tank takes a nature damage over time from Acid Breath: keep it topped up.
Damage dealers
- Stay behind or beside him: Wing Flap knocks back whoever stands in front.
What wipes groups
- Pulling before the healer has mana.
Abilities
- Acid Breath (Classic data): Inflicts 305 Nature damage and an additional 20 damage every 5 sec. to enemies in a cone in front of the caster. Lasts 45 sec. (Numbers at level 60; they grow with your level.)
- Wing Flap (Classic data): Strikes enemies in a cone in front of the caster, knocking them back.
Tank tips (Classic data)
- Face Dreamscythe away from the group: Acid Breath hits a 60° cone in front of it about every 12 sec.
- Face Dreamscythe away from the group: Wing Flap hits a 90° cone in front of it about every 20 sec.
Damage tips (Classic data)
- Attack from behind or the side (Acid Breath hits in front).
- Attack from behind or the side (Wing Flap hits in front).
Loot
- Drakeclaw Band (Classic data, 6.2%)
- Drakestone (Classic data, 6.2%)
- Firebreather (Classic data, 6.2%)
- Smoldering Claw (Classic data, 6.2%)
- Drakefang Butcher (Classic data, 6.2%)
- Bloodfire Talons (Classic data, 6.2%)
- Nightfall Drape (Classic data, 6.2%)
- Dawnspire Cord (Classic data, 6.2%)
8. Jammal'an the Prophet
A troll priest with Ogom and a group of guards. He heals himself, casts fire on the ground and hexes a player.
- Clear or crowd-control the troll guards first, then pull him.
- Interrupt his healing and kill the totems that root the group.
- Move out of the fire as soon as it lands.
Tank
- Pick up the Earthgrab Totem when he drops it and hold him away from the group.
- Pull him into a spot where the group can move around the fire.
Healers
- Move out of Flamestrike at once: it keeps burning for a while.
- Hex of Jammal'an turns a player into a harmless frog for a few seconds: heal the group while they are out.
Damage dealers
- Interrupt Healing Wave when you can: if he heals to full the fight drags on.
- Kill the totems first, they root people in place.
- Move out of Flamestrike.
What wipes groups
- Standing in fire while rooted by the totem.
Abilities
- Healing Wave (Classic data): Calls upon Nature magic to heal an ally.
- Hex of Jammal'an (Classic data)
- Earthgrab Totem (Classic data): Summons an Earthgrab Totem that lasts 30 sec. and periodically immobilizes nearby enemies.
- Flamestrike (Classic data): Calls down a pillar of flame, burning all enemies in a selected area and inflicting additional damage every 2 sec. for 8 sec.
Tank tips (Classic data)
- Pick up the Earthgrab Totem that joins about every 31 sec.
Healer tips (Classic data)
- Move out of Flamestrike.
Damage tips (Classic data)
- The Earthgrab Totem joins about every 31 sec: kill or crowd-control it.
- Move out of Flamestrike.
Loot
- Vestments of the Atal'ai Prophet (Classic data, 33%)
- Kilt of the Atal'ai Prophet (Classic data, 33%)
- Gloves of the Atal'ai Prophet (Classic data, 33%)
- Head of Jammal'an (Classic data, 100%)
- Fetish of Hakkar (Classic data, 40%)
Loot from the dungeon
- Slitherscale Boots (Classic data)
- Blade of the Wretched (Classic data)
- Fist of the Damned (Classic data)
- Eater of the Dead (Classic data)
Quests
Into The Temple of Atal'Hakkar (level 50, Alliance)
Gather 10 Atal'ai Tablets for Brohann Caskbelly in Stormwind.
Get it from: Brohann Caskbelly, Stormwind City (69.5, 40.4). (Classic data)
The Temple of Atal'Hakkar (level 50, Horde)
Collect 20 Fetishes of Hakkar and bring them to Fel'Zerul in Stonard.
Get it from: Fel'zerul, Swamp of Sorrows (47.9, 54.8). (Classic data)
Into the Depths (level 51)
Find the Altar of Hakkar in the Sunken Temple in Swamp of Sorrows.
Get it from: Marvon Rivetseeker, Tanaris (52.7, 45.9). (Classic data)
Secret of the Circle (level 51)
Travel into the Sunken Temple and discover the secret hidden in the circle of statues.
Get it from: Marvon Rivetseeker, Tanaris (52.7, 45.9). (Classic data)
The Sunken Temple (level 51, Horde)
Find Marvon Rivetseeker in Tanaris.
Get it from: Witch Doctor Uzer'i, Feralas (74.4, 43.4). (Classic data)
Blood of Morphaz (level 52)
Kill Morphaz in the sunken temple of Atal'Hakkar, and return his blood to Greta Mosshoof in Felwood. The entrance to the sunken temple can be found in the Swamp of Sorrows.
Get it from: Ogtinc, Azshara (42.4, 42.6). (Classic data)
Zapper Fuel (level 52, Horde)
Deliver the Unloaded Zapper and 5 samples of Atal'ai Haze to Larion in Marshal's Refuge.
Get it from: Liv Rizzlefix, The Barrens (62.4, 38.7). (Classic data)
Jammal'an the Prophet (level 53)
The Atal'ai Exile in The Hinterlands wants the Head of Jammal'an.
Get it from: Atal'ai Exile, The Hinterlands (33.8, 75.2). (Classic data)
The God Hakkar (level 53)
Bring the Filled Egg of Hakkar to Yeh'kinya in Tanaris.
Get it from: Yeh'kinya, Tanaris (67.0, 22.4). (Classic data)
The Essence of Eranikus (level 55)
Place the Essence of Eranikus in the Essence Font located in this lair in the Sunken Temple.
Get it from: unknown. (Classic data)
Eranikus, Tyrant of the Dream (level 60)
Travel to the continent of Teldrassil and find Malfurion's agent somewhere outside the walls of Darnassus.
Get it from: Malfurion Stormrage. (Classic data)
Essence of Eranikus: this item starts a quest.
Videos
- WoW: Forever Journey EP.3 | Sweden (ft. Guzu, Valter Skarsgård & AnnieFuchsia) by World of Warcraft
- The WoW Forever PROBLEMS Video... | WOW FOREVER by WillE
- Blackfathom Deeps Guide – WoW Forever: Quests, XP, Every Boss and Best Loot for Every Class by iCocas
- WoW Forever Lore: The Story Behind Every Dungeon (All 9 New Ones Too) by Azeroth Herald | WoW Forever
- WoW Forever Warrior Leveling Guide 1-60: UPDATED NOV 11 FOR LAUNCH! by Saltii
Read more
- Blizzard's WoW: Forever Journey ends in Sweden: the dungeons and zone they name
- WoW Forever Legacy system explained: every perk, challenge and reward
- The Legacy System in WoW Forever: how to earn your points and what to spend them on
Other dungeons for these levels
- Maraudon (levels 46–55)
- Blackrock Depths (levels 52–60)
- Dire Maul (levels 54–60)
- Blackrock Spire (levels 55–60)
- Scholomance (levels 58–60)
- Stratholme (levels 58–60)
Sources
The WoW Forever client (build 1.60.1.70938), what players' ForeverDB addons saw in Forever, Blizzard's posts, and for Classic instances CMaNGOS classic-db (GPL-3.0), labelled Classic data.
Not known yet
- No boss models yet: the client doesn't say which creature each boss is.
- No drops seen in Forever yet. The ForeverDB addon records them as you play.
- Dungeon map: boss spots are Classic spawns (CMaNGOS); Forever may have moved them.